
How to install Google Analytics on a WordPress website – MonsterInsights or php?
If you have a WordPress page or blog and need to monitor the traffic and statistics of your site, you must have tried to install Google Analytics. But where do you insert the code? One thing is certain it is absolutely necessary to keep track of the analytics of any web project as you will get data and trends that would otherwise be impossible. If you don’t measure, you won’t know if the changes you make are effective or not.
Quick Links
In this post we will explain how to install Google Analytics on your website or blog in two different ways, one simple and one a little more advanced
The simple way – with a WordPress plugin for Google Analytics.
There are WordPress plugins to install Google Analytics on your site quickly and easily, without knowing HTML code. You only need to have a Google Analytics account for your website or blog, and have the UA code that the tool gives us. In most cases, just enter this code and you already have it.
Advantages: It’s quick to set up and you don’t need to be an expert. Simply enter the UA code or synchronize your web page with your Google Analytics account.
Disadvantages: You are using a plugin for something you could do using HTML code. With some of the plugins out there you can marginally slow down your website.
The plugin we recommend is MonsterInsights – we have used it in literally hundreds of sites without any problems. This Google Analytics plugin for WordPress will not only allow you to link your analytics account with your page, with its Affiliate Link Tracking feature you can track specific affiliate links .
In this post we will talk about how and where to download it, its configuration and what features this complete plugin offers us.
Download and Install MonsterInsights for WordPress
The first thing before starting with its configuration and use is to download it, we can find it in the WordPress plugin repository searching for “monsterinsight”

When you put it in the search we will see several similar ones, make sure that the developer matches the name and the icon like below, now simply click on Install now and then activate.

Upon activating it, a tab will appear that guides us through 5 steps of the initial configuration :

- We can choose the type of website we have, e-commerce, blog or business
- In the second step, you will be asked to link your analytics account, you can do it now or later but this step is essential because without this the plugin will not work correctly.
How to Install Google Analytics with Monster Insights
In this step, we must click where it says “Connect MonsterInsights” and we will be redirected to our analytics account where we will have to create a new property with our website …

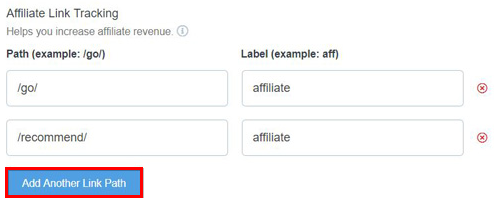
The following screen shows you some recommended basic settings, such as event tracking or affiliate links thanks to the “Affiliate Link Tracking” option
Next, we recommend a series of addons that are paid.
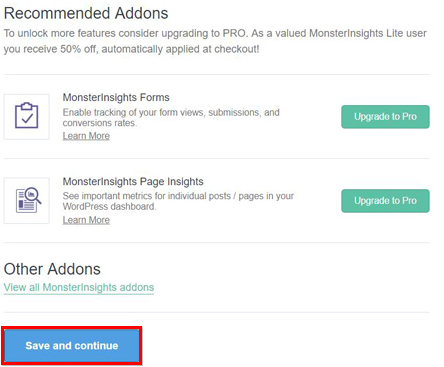
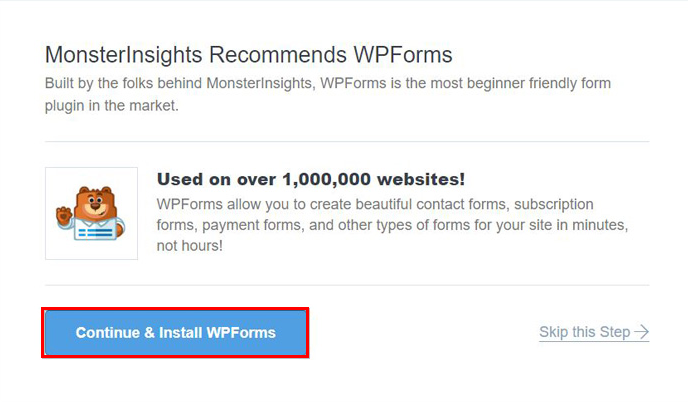
You can choose or not to install these add-ons – the plugin will work perfectly without them and you can add them in later if you want. The next step is to install related plugins (again only if you want to), in this case, [eafl id=”18976″ name=”WpForms” text=”WPForms”] – a great drag and drop form builder.
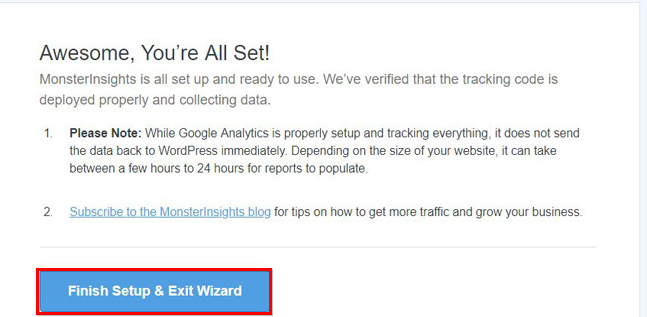
In the last step simply click on “Finish Setup & Exit Wizard” and you will have finished the Initial configuration.
MonsterInsights functionalities
With MonsterInsights you can see all the data you need without ever leaving you admin page
- Detailed reports about your visitors – locations, demographics, devices and more.
- The channel they used to arrive at your site including the keywords they used.
- Complete GDPR compliance whether you are based in the EU or not. You can use the EU Compliance addon to make your site compliant with GDPR and other EU privacy regulations.
- Tracking to trace downloads – white papers, case studies etc. anything you might be using for inbound marketing purposes
- You can connect Google Analytics eCommerce tracking with WooCommerce, Easy Digital Downloads, or MemberPress to see e-commerce data about your conversion rate, transactions, or average order value.
- It’s fully compatible with popular WordPress themes. We have never had a problem with this plugin and themes. This includes themes that have a place to add your UA code directly (of course with these themes add ing your code directly would mean going over to Google to see the results.
The advanced way. With HTML code inside the <head> tag.
If you are a bit more advanced user and know some HTML code you have another alternative: paste the Google Analytics code directly into the <head> tag of your website. If you have designed HTML web pages, you will know that in the code of each HTML page you have an opening <head> tag and a closing </head> tag at the top. Between both opening and closing tags there are a series of lines of code where the links to the site’s style sheet, sources, javascript files, etc. are usually inserted.
In the case of WordPress, it is a PHP-based system and pages are dynamically constructed, that is, to create each page the tool takes portions of code from various files and thus builds them intelligently. Normally, among the files of the site, there is one called header.php which includes all the HTML code that you will add to all pages of the site so that they all have the same header.
Therefore, to implement the Google Analytics code, you just have to access the editing area of the WordPress panel and then go to the header.php file, where you will find at the top all the HTML code of the site header : <head><meta> <title> tags, etc. What you have to do here is paste the Google Analytics code into a line between the <head> and </head> tags. Once you’ve done this, Google Analytics can now start tracking your website or blog statistics.
Advantages: You save the installation of plugins, thereby optimizing the speed of the site.
Disadvantages: It requires more advanced knowledge, knowing some HTML code and getting to edit an .php file with the risk that this entails if you are not at all expert. If you do not enter the code in the right place or if you delete or modify lines of code of the subject you can spoil its correct operation and finally have to reinstall everything again.
Apart from this, by doing it through code you are simply enabling the tracking of your web page or blog by Google Analytics, but you are missing all the monitoring and configuration possibilities in an internal WordPress Dashboard offered by some of the plugins mentioned above . Therefore, before making the decision, reflect what exactly you will need and assess if you have the necessary knowledge to venture to modify the code of your theme or template.
Below I explain in detail how to insert the Google Analytics code between the <head> and </head> tags of the HTML code of your website in WordPress.
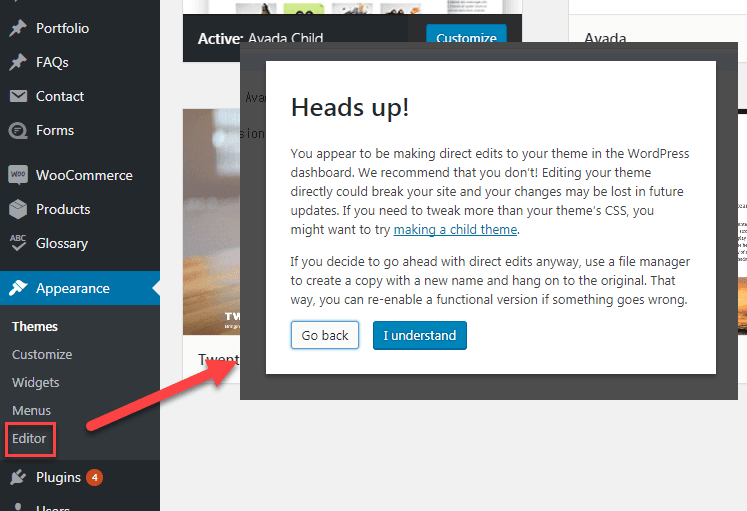
1. Access the WordPress file editing area
To access the area where you can edit your files you must go to Appearance> Editor in your main WordPress Dashboard menu.
2. Locate the header.php file
On the right side of this section you have a list with all the files that you can edit in your theme or template. Find the header.php file and click to display all the code in the central zone.
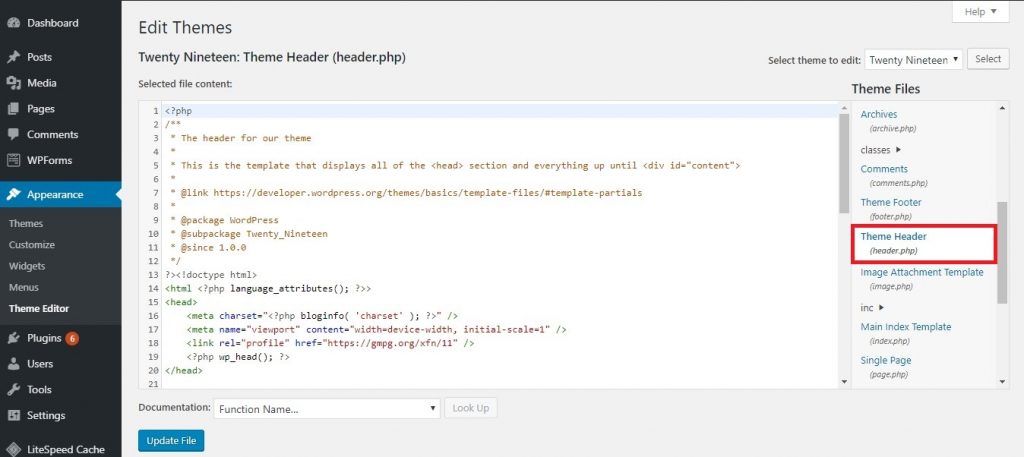
3. Locate the <head> and </head> tags and enter the code
Search inside the code for the <head> and </head> tags and anywhere between the two tags press enter to open a new line. Then paste the code provided by Google Analytics for the manual installation of the tracking functionality of your website or blog. Once you have pasted the code, click on the Update file button in the lower left. Now you have Google Analytics running for your site.
Conclusion
Nowadays it is absolutely necessary to have a system that allows us to measure the user experience on our website.
Monster Insight makes this task very much easier thanks to its easy configuration and synchronization with Google Analytics, it also includes very interesting features such as affiliate link tracking.
The more advanced version is aimed at a professional audience with specific needs, but with the Free Version, most of us will probably have more than enough.

What Is WooCommerce Product Slider and Why Your Store Needs It
Why Do Product Images Matter So Much in Online Stores? When someone visits an online store the…
0 Comments9 Minutes

How to Streamline Your Customers’ Shopping Experience?
The goal for any online store is to make shopping as smooth as possible. When visitors move…
0 Comments8 Minutes

Strengthening Brand-Customer Relationships Through Gamified Loyalty Programs
Creating lasting connections with customers has become increasingly vital as the marketplace grows…
0 Comments6 Minutes

How to Use SEO and SEA Together in Search Engine Marketing
In digital marketing, search engine marketing (SEM) plays a critical role in improving online…
0 Comments10 Minutes

Content Marketing Growth Hacks: Real Shortcuts to Drive Traffic
Are you still lagging in content marketing? Sticking to these old strategies seems…
0 Comments10 Minutes

How to Build a Strong Local Following Using Social Media Marketing
In the days of likes, shares, and stories, local businesses have a golden opportunity to create…
0 Comments9 Minutes

Why WooCommerce is the Best Choice for Your Online Store?
WooCommerce stands out as a top option for anyone looking to build an online store. This platform…
0 Comments8 Minutes

How to Use AI-Powered SEO Tools for WordPress eCommerce
SEO is a critical factor in the success of any e-commerce WordPress store. As competition…
0 Comments11 Minutes