
How to effortlessly migrate your WordPress site
A big portion of WordPress site owners at least once came into a situation where they needed to migrate their WordPress site, to another domain or another server or hosting company. Migrating a WordPress site can be a simple and relatively quick task when the proper tool built for this specific purpose is used. The Backup Migration plugin is designed to make the migration process quick and stress-free, even for users that are not tech-savvy. You can check the plugin out by spinning up a free WordPress hosting instance.
Backup and Migration process step by step
The complete migration process with the Backup Migration plugin takes only several simple steps:
1. Start the process by downloading and installing the Backup Migration plugin on the WordPress site that you want to migrate. This plugin is free to download from the public WordPress plugin directory: https://wordpress.org/plugins/backup-backup/
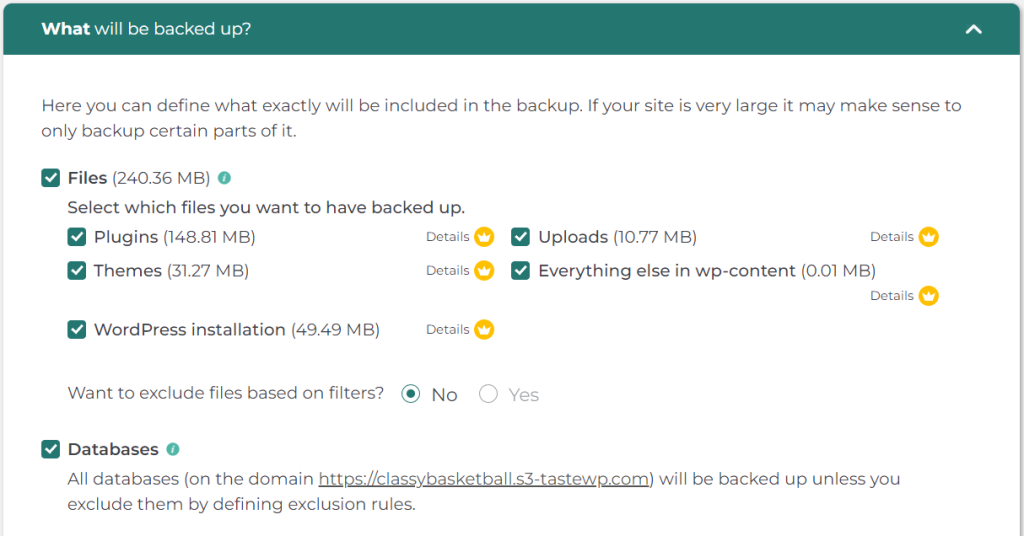
2. The next step is to select all files, folders, and databases without exclusions on the Backup Migration’s settings page, under the section “What will be backed up?”, and Save the settings. With this setup, a full site backup will be created
3. The creation of the backup is started by clicking on the “Create backup now!” button. For sites larger than 2GB, you will need a premium Backup Migration plugin add-on. Once the backup creation is finished, you may download the backup file to your local machine, if you’d like to save a reserve copy.
4. Whether you are migrating your site to another hosting provider or just to another domain, you will need to prepare a fresh WordPress instance. Commonly, hosting providers offer this as a one-click WordPress install action, but it is not too complicated to do it on your own, too. Once you have the brand new WordPress site ready, install the Backup Migration plugin on it, in the same way as it is explained in step #1.
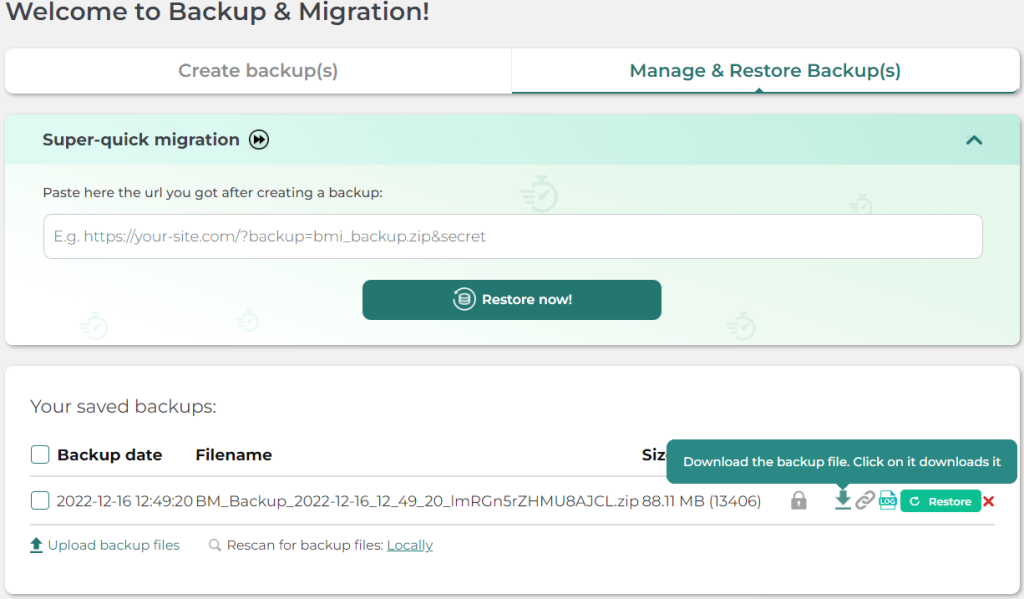
5. Now you are ready to restore the original site to a newly created one. On the destination site, navigate to the tab “Manage & Restore Backup(s)” within the Backup Migration plugin, where you have two options for restoring the backup from the original site. In case you are migrating your site to a new domain, option a) is more suitable, while in the case when the domain remains the same, option b) is more adequate, because in this case, you will need to take the original site offline before switching on a new one.
a) Super-quick migration is done by pasting the link of the backup file from the source site, and hitting the “Restore now!” button. You can get the link for the specific backup on the same plugin screen, by clicking on the “chain” icon next to the backup file name.
b) Manually uploading the backup file is done on the same plugin screen, by clicking on the “Upload backup files” button. Once uploading of the backup file is completed, click on the light green “Restore” button on the right-hand side.
Upon successful migration process, your original site will be fully restored to the new location. In case you have changed the domain name and the old site is still online, it is advisable to set up redirections on your old domain, to a new domain. The Redirection plugin, which is equally easy to use, can help you manage this.
Fine tweaks for backup creation and migration
1. Large files
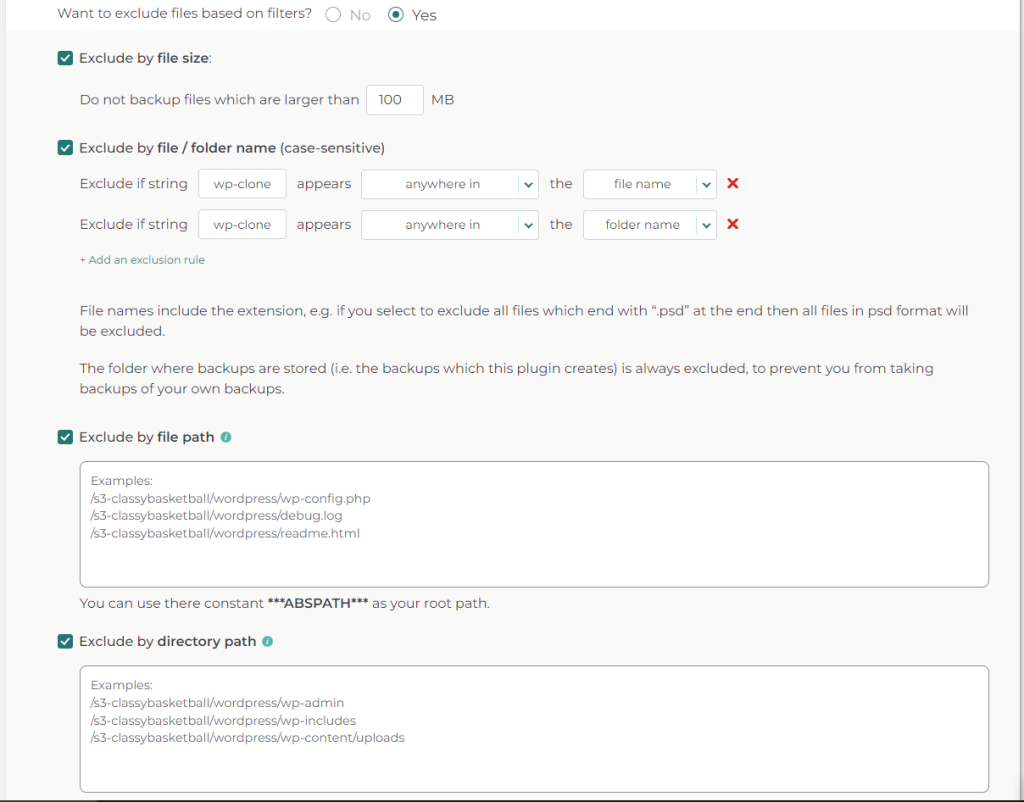
Although in step #2 we included all files on the site for the backup creation, it may be a good idea to leave some files behind, especially big and unused files. With its default settings, the Backup Migration plugin will exclude files larger than 100MB, which are very often just old, outdated site backup files, but other types of files can be in this group as well.
You should not worry, as all these excluded files are always listed in the log during backup creation, so you have better insight into how to alter the rules if there is a need. When users are familiar with some specific huge files on their sites, they can exclude them by name, file path, directory path, or a specific string.
2. Large databases
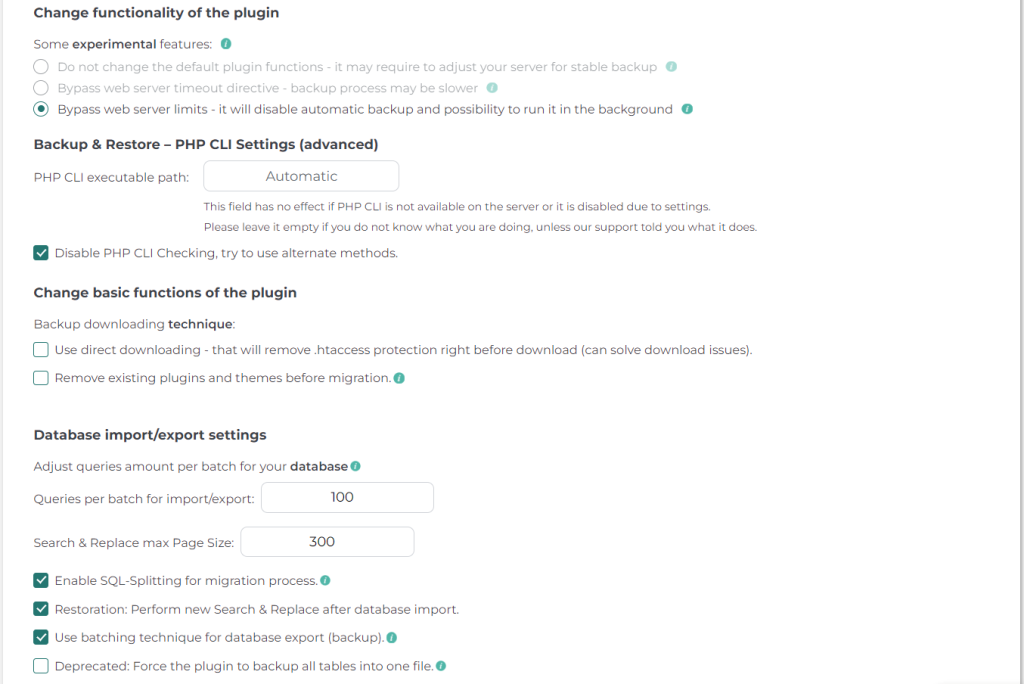
Large databases are common on large sites, and WordPress site owners are often migrating their sites when the server/hosting provider resources become too poor to keep such sites running. In such cases, it is recommended to use Backup Migration features specifically created to make the process smoother even on servers with modest performance. These advanced settings are located in the “Other Options” section of the plugin, and they should be set as follows:
- Bypass server limits (#2 or #3);
- Disable PHP CLI checking and use alternate methods;
- Database queries per batch set to 100;
- SQL-Splitting enabled.
In summary
Migrating a WordPress website can be routinely done without hassle with the Backup Migration plugin. It makes the process carefree for the user, and the supreme support that compliments this plugin is there to ensure that the migration process is done successfully, regardless of hosting provider, server type, or how customized the WordPress site of the user is.

What Is WooCommerce Product Slider and Why Your Store Needs It
Why Do Product Images Matter So Much in Online Stores? When someone visits an online store the…
0 Comments9 Minutes

How to Streamline Your Customers’ Shopping Experience?
The goal for any online store is to make shopping as smooth as possible. When visitors move…
0 Comments8 Minutes

Strengthening Brand-Customer Relationships Through Gamified Loyalty Programs
Creating lasting connections with customers has become increasingly vital as the marketplace grows…
0 Comments6 Minutes

How to Use SEO and SEA Together in Search Engine Marketing
In digital marketing, search engine marketing (SEM) plays a critical role in improving online…
0 Comments10 Minutes

Content Marketing Growth Hacks: Real Shortcuts to Drive Traffic
Are you still lagging in content marketing? Sticking to these old strategies seems…
0 Comments10 Minutes

How to Build a Strong Local Following Using Social Media Marketing
In the days of likes, shares, and stories, local businesses have a golden opportunity to create…
0 Comments9 Minutes

Why WooCommerce is the Best Choice for Your Online Store?
WooCommerce stands out as a top option for anyone looking to build an online store. This platform…
0 Comments8 Minutes

How to Use AI-Powered SEO Tools for WordPress eCommerce
SEO is a critical factor in the success of any e-commerce WordPress store. As competition…
0 Comments11 Minutes