
How to accept PayPal Donations on your WordPress Website?
Have you ever wondered how you would accept PayPal donations for your business, organization, or even fundraising event in your WordPress site while using WooCommerce?
Quick Links
Well, we will take you through the easiest way to do it in this blog post.Before we can start on how to set this up, it is worth noting that many businesses, creative industries, and organizations are looking for patrons to support them financially especially during the pandemic. PayPal is no doubt one of the easiest ways to receive donations on your WordPress site. Combining that with WooCommerce makes it an easy task.
Accepting PayPal Donations in PayPal
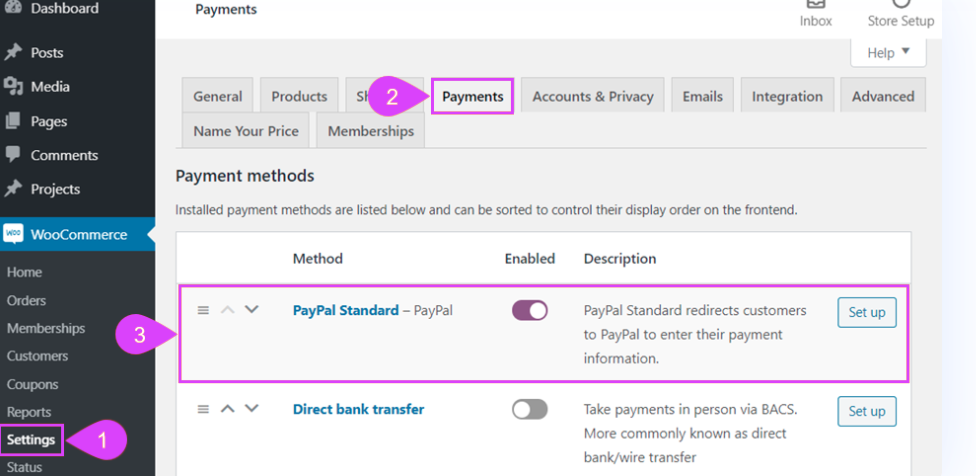
To accept PayPal donations in WooCommerce, you will first have to enable PayPal by going to Settings under WooCommerce, select the Payment tab. Click the enable button under PayPal standard and then proceed to set up your account information.
WooCommerce does not have the option where a user can change the prices of products by default. With a bit of research, we found out that Name your price plugin does this perfectly. Our goal is to create products that can be categorized as Donations and users can set the price they would want to pay themselves. Name your price is a premium extension, but well worth it.
Creating a Donations Category
Since we will be using WooCommerce Products to collect donations, we will need a category to manage these donations.
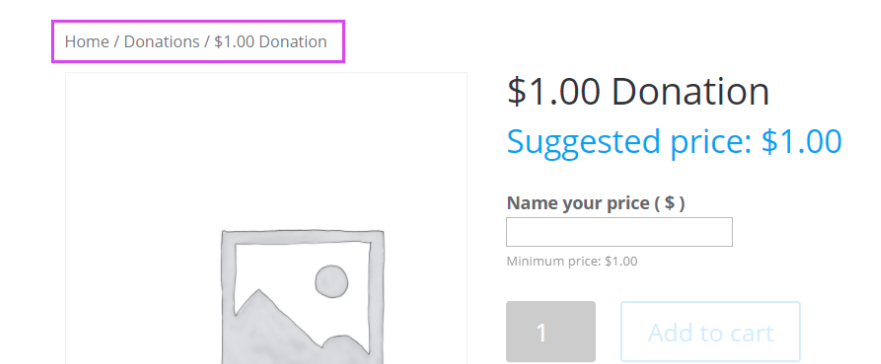
These product categories are very useful in WooCommerce as they can be used to manage orders. WooCommerce also displays Categories as breadcrumbs in your frontend which makes it easier for users to understand where to donate.
How to create Donation Products
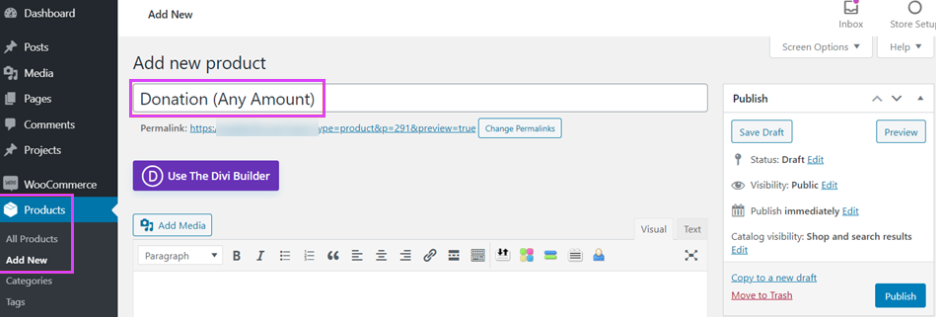
To begin this process make sure you have installed Name your price and then activate it. Create a new WooCommerce product by navigating to Products – Add New. Based on experience, it is always advisable to create multiple donation products and then setting their names to the different values of a donation. This is because users find it very easy to donate and it also helps you maintain good records.
After giving the donation product a name, scroll down to where we have the Product data Metadata. You will find a new checkbox addition, Name your Price, Click on it to enable
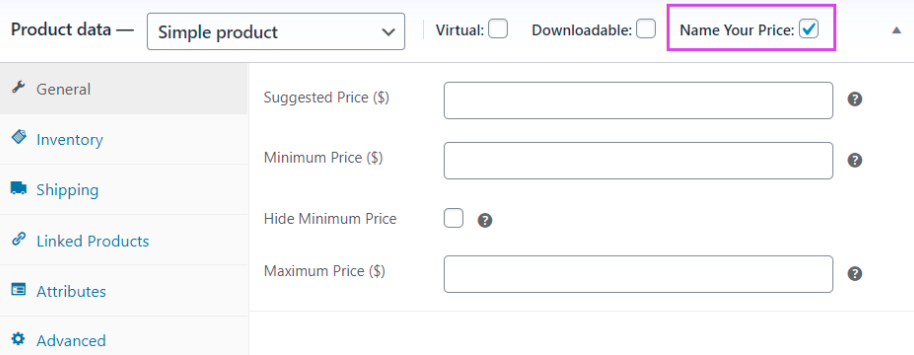
You can now save your product as you do not need to feel in any other information. However, it is advisable to set a minimum price for your product donation, as you might end up being spammed with donations of Zero dollars. These donations do not even go to PayPal and might end up messing your records.
In the case where your customers have a dollar amount ready to donate, they will be prompted to Checkout in PayPal.
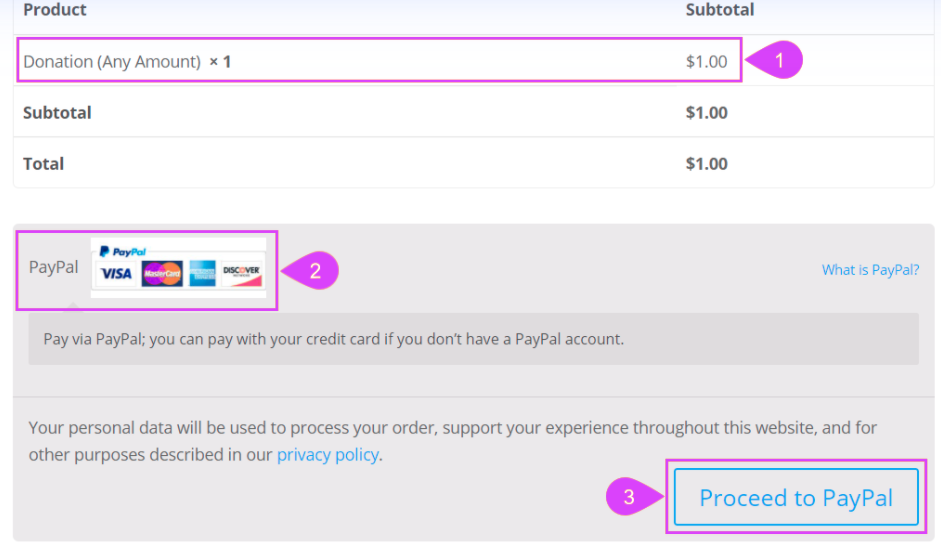
The user is then redirected to PayPal. If this doesn’t seem to please you and you prefer customers to directly checkout from your site, you can use this plugin, WooCommerce One-Page Checkout
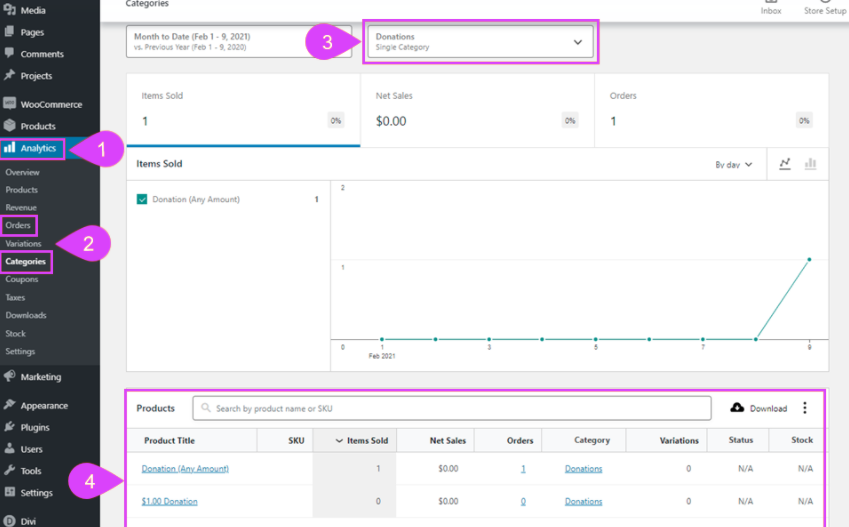
How to monitor donations
After the successful payment by your customer, you can view donations by going to Analytics –Orders
One thing to note is that you should not just rely on PayPal if you are interested in international donations as not all countries support PayPal. In this case, you would need to add an alternative payment processor.

What Is WooCommerce Product Slider and Why Your Store Needs It
Why Do Product Images Matter So Much in Online Stores? When someone visits an online store the…
0 Comments9 Minutes

How to Streamline Your Customers’ Shopping Experience?
The goal for any online store is to make shopping as smooth as possible. When visitors move…
0 Comments8 Minutes

Strengthening Brand-Customer Relationships Through Gamified Loyalty Programs
Creating lasting connections with customers has become increasingly vital as the marketplace grows…
0 Comments6 Minutes

How to Use SEO and SEA Together in Search Engine Marketing
In digital marketing, search engine marketing (SEM) plays a critical role in improving online…
0 Comments10 Minutes

Content Marketing Growth Hacks: Real Shortcuts to Drive Traffic
Are you still lagging in content marketing? Sticking to these old strategies seems…
0 Comments10 Minutes

How to Build a Strong Local Following Using Social Media Marketing
In the days of likes, shares, and stories, local businesses have a golden opportunity to create…
0 Comments9 Minutes

Why WooCommerce is the Best Choice for Your Online Store?
WooCommerce stands out as a top option for anyone looking to build an online store. This platform…
0 Comments8 Minutes

How to Use AI-Powered SEO Tools for WordPress eCommerce
SEO is a critical factor in the success of any e-commerce WordPress store. As competition…
0 Comments11 Minutes