Getting Started: A Step-by-Step Guide to Creating Your Blog on WordPress
We are aware that starting a blog can be intimidating, particularly for those who need experience. One may assert that others share the same perspective. We’ve decided to compile an in-depth how-to manual for WordPress blog beginners for those without technical expertise.
Quick Links
In contemporary times, blogs have transcended their initial purpose as a medium for personal expression. They have become an integral part of modern existence.
Specific individuals utilize their blogs intermittently to disseminate personal narratives, whereas large corporations allocate substantial financial resources to maintain and develop their blogs. Blogging has emerged as an ideal career for numerous individuals, enabling them to engage in this activity remotely from anywhere worldwide.
The benefits of WordPress blogging
As a content management system (CMS), WordPress ranks among the best of its kind. WordPress now serves as the backbone for over 45.8% of all websites.
Any kind of website can create with WordPress, but it shines the most on blogs.
WordPress’s user-friendliness is just one of several advantages when using the platform for blogging. The administration panel’s layout is clean and straightforward, making it a breeze to get about.
In addition to mobile-friendly layouts, this platform simplifies content modeling and makes it easy to share content across several channels. It’s also very affordable, adaptable, and optimized for search engines (SEO).
If you need help setting up or running your blog, there is a big community of people who are always ready to help or even to integrate platforms such as Shopify and Quickbooks.
WordPress is a fantastic resource for professionals of varying skill levels and in a wide variety of fields. It’s easy to use and doesn’t require any prior knowledge of coding or design to make anything from a complex corporate site and a marketplace platform to a personal blog.
What is a blog?
Weblogs, or “blogs,” are web pages that are constantly updated with new information, whether it be personal reflections or promotional material. In order to encourage participation from their readers, many blogs add comment boxes at the end of each post.
Bloggers‘ ability to speak honestly and connect with their followers is one of the primary benefits of the medium. Moreover, some blogs also provide a “comments” section, where readers can interact with the blogger directly.
Participation in the comments area can strengthen the relationship between the blogger and the reader.
One of the best things about writing a fact-based blog is the personal connection you can have with your readers.
It’s a wonderful method of winning your audience’s trust.
Earning your readers’ confidence and loyalty is important if you want to turn your blog into a side business or full-time company — more on that in a moment.
Building your blog
Let’s go over the details of how to set up a WordPress blog from beginning to end.
Step 1: Choosing a hosting package
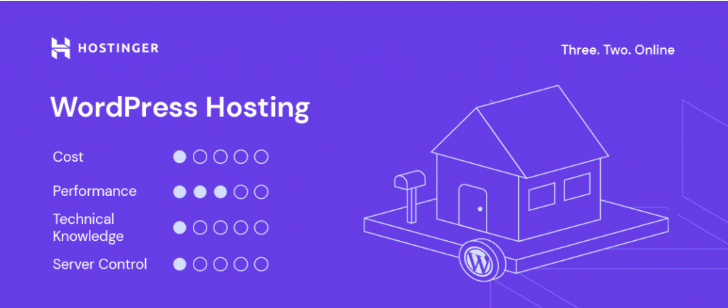
Source: hostinger.com
Choosing a hosting plan is the first step in setting up a WordPress blog. Blog hosting is like a building’s foundation; it’s where all your blog’s files live and are available to readers.
Compare hosting providers
Start by looking at the many options for web hosting. Research different hosting providers, compare pricing and features, read customer reviews, and consider the reputation and reliability of each option before making your decision.
Bluehost, SiteGround, and HostGator are a few of the most well-known choices. If you want the best WordPress performance, look for a host that specializes in WordPress.
Choose an appropriate hosting plan
For the most part, shared hosting is an excellent place to begin. It’s cheap and adequate for a starter blog. The first year of your domain name is free with shared hosting options, and you can install WordPress with a single click.
Step 2: Choose and register a website address
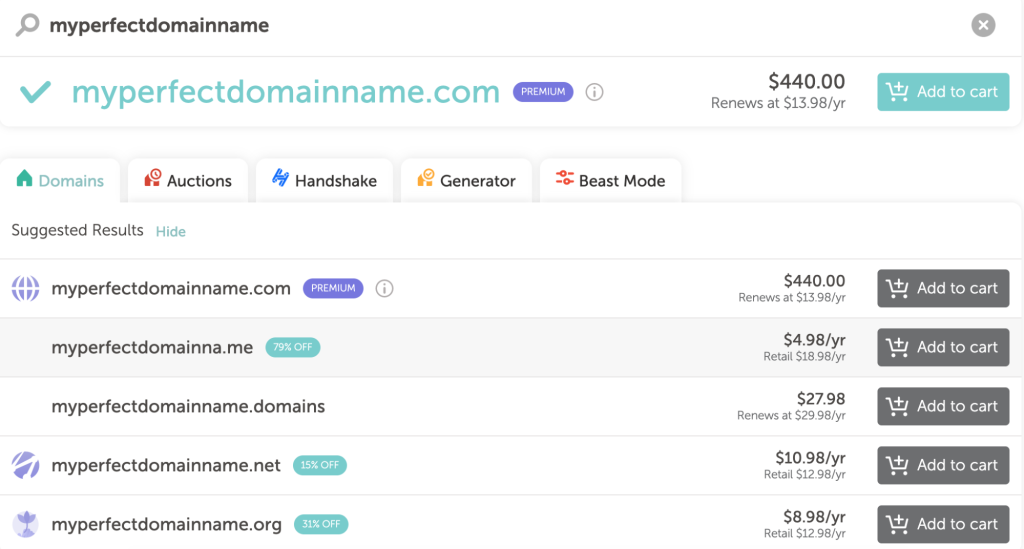
Source: forbes.com
Choose a domain name that is easy to remember and related to your blog’s content.
Brainstorm domain name ideas
Consider your blog’s topic or niche while developing a domain name. Pick names that are simple to say and spell.
Check domain name availability
Use a domain registrar like GoDaddy or Namecheap to see if the domain name you want is available.
If the name you want is already taken, try thinking of other options or becoming creative with the help of domain name generators.
Register your chosen domain name
If the domain name you want is still available, the next step is to register it with a domain registrar.
A yearly renewal charge is usually required to keep the domain in your name.
Step 3: Install WordPress
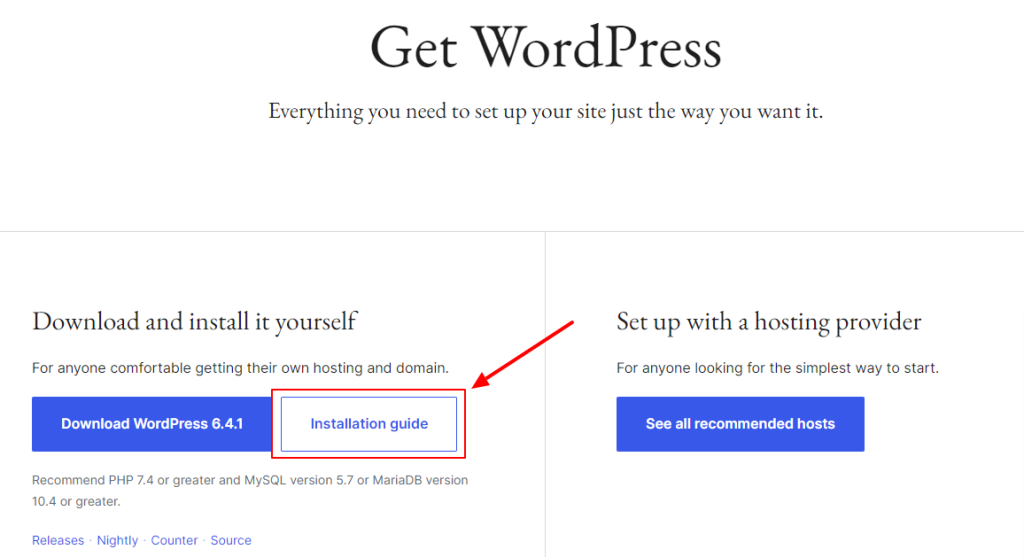
Your blog runs on the WordPress content management system (CMS). The procedure for setting it up is simple.
Go to your hosting account and sign in
Use the credentials provided by your hosting provider to access your account’s management dashboard.
Browse to where you’ll see “One-Click Install”
A “One-Click Install” or “Website Installer” button should be available in your hosting control panel.
Select WordPress as your CMS
WordPress is one of the world’s most popular content management systems (CMSs). The installation process will require entering a domain name and creating an administrator account.
WordPress installation on your server
Click the “Install” button to start the installation procedure. When everything is complete, you’ll receive access to WordPress’ administration.
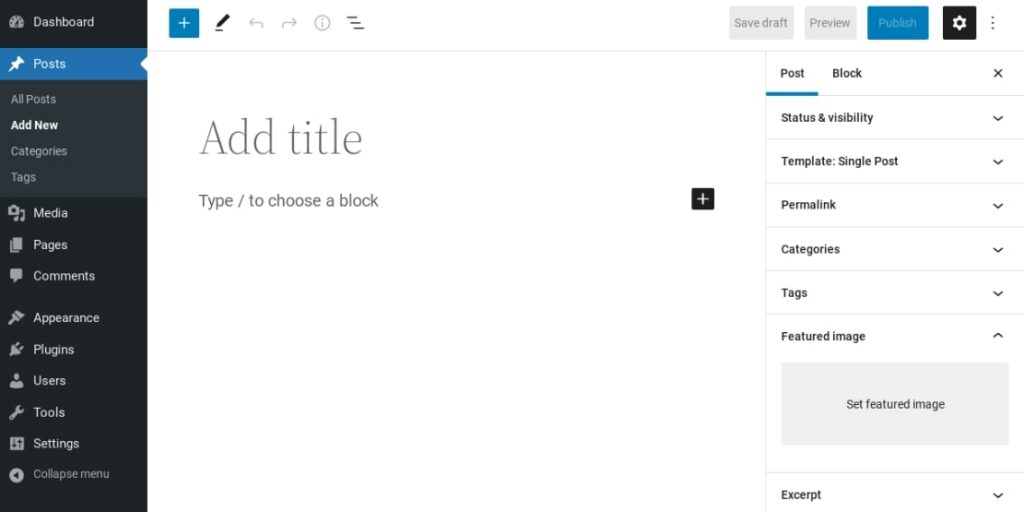
Step 4: Log in to WordPress
The WordPress admin dashboard is where you’ll make changes to your blog and control its content. You can access it through the following steps:
Go to the URL of your blog, followed by “/wp-admin”
for example, “yourblog.com/wp-admin/”
Create a new account using the admin credentials provided to you during WordPress installation.
Choose a name for your website now. Usually found at the top of each post, this is your blog’s official name.
A slogan is optional but can help distinguish your blog from others. If either of these needs to be updated, go back and do so.
Step 5: Title your blog
The niche of your new blog should guide the title you give your WordPress site. Consider using your given name plus your last name as an example of a “brandable” name. The greatest domain names are brief, easy to remember, and relevant to the site’s content.
The tagline can then summarize your blog’s focus in a few words. This is another chance to impress your readers with your imagination.
Blog title and tagline in finance.
Any new WordPress site will have the title “My WordPress,” and the “Just another WordPress site” tagline applied.
Go to Settings > General from the control panel to change the blog’s title and tagline.
Change the WordPress title and tagline in settings.
The site’s title and tagline can be changed. When you’re through making changes, be sure to click the Save Changes button.
Your WordPress blog’s title and tagline will appear depending on your selected theme.
Adding a logo and favicon is essential to branding your WordPress blog and making it appealing.
Your logo represents your blog’s identity, while the favicon is the small icon that appears in the browser tab when your site is open. Here’s how to do it.
Step 6: Create your logo
Design a logo that reflects your blog’s theme or niche. Use graphic design software like Adobe Photoshop or Canva, or hire a professional designer.
Ensure your logo is in an image format like PNG, JPEG, or SVG for uploading to WordPress.
Upload your logo
- Login to your WordPress admin dashboard.
- Go to “Appearance” and select “Customize.”
- In the Customizer, find the “Site Identity” or similar option (the exact label may vary depending on your theme).
- Click the “Select Logo” button to upload your logo image from your computer.
- Adjust the logo’s size and position to fit your site’s header.
- Save your changes.
Add a Favicon
- Create a square image for your favicon (usually 32×32 pixels or 512×512 pixels).
- Save the favicon image with a suitable name (e.g., favicon.ico) and ensure it’s in a supported format like ICO or PNG.
Upload your Favicon
- Go back to the WordPress Customizer.
- Look for an option related to “Site Icon” or “Favicon.”
- Click on the “Select Image” button and upload your favicon image.
- WordPress will generate different sizes of your favicon for various devices and browsers.
- Save your changes.
Your logo and favicon are now set up for your WordPress blog. They will appear on your site, enhancing its branding and recognition.
Step 7: WordPress theme setup and customization
Source: wpbeginner.com
Blog themes determine how your website will seem to visitors when it’s powered by WordPress.
The most fun and rewarding part of building a WordPress blog is customizing its look and feel.
Your site can use thousands of pre-made WordPress themes. Some themes are free, others expensive.
- Click Appearance » Themes in your WordPress dashboard to change your theme.
- You can search the official WordPress.org themes directory for 10,000+ free WordPress themes. Sort by popular, latest, featured, industry, layout, and other features.
Select a theme
A Preview button appears when you mouse over a new theme. Clicking it opens the theme preview, showing how the design might look on your website.
Preview theme
Your theme preview may not match the screenshot because you will change and set it up later. Look for design, colors, typography, and other features.
The finest WordPress theme suggestion is to choose a simple design. It keeps things clean and improves user experience.
When you find a theme you like, click it to reveal the Install button. Wait for the theme installation after clicking it. Then, an Activate button will replace the Install button. Click it to activate the theme.
WordPress theme installation and activation
You can customize your theme by choosing Customize under Appearance after installing it.
Theme-specific widgets and customization tools help you customize your blog look.
Step 8: Create your first post on your blog.
Now that you have completed the configuration of your blog, it’s time to begin producing content for it. Create your first blog post about a topic related to your niche.
Make use of the editor that comes with WordPress to format your writing, add photos, and then publish it for your audience to read. Enhance your content by adding photos.
For more engaging visual content, consider learning how to make infographics. You can use infographic software like Venngage or even PowerPoint to craft compelling infographics for your blog. Once everything is set, publish it for your audience to read.
You can use design tools or even PowerPoint to craft compelling infographics for your blog. Once everything is set, publish it for your audience to read.
Step 9: Earning from your blog
Once you’ve set up your blog, it’s time to explore ways to make money from it. While there are no shortcuts to riches, here are three effective methods.
- Google AdSense

Source: seroundtable.com
Displaying ads on your blog through Google AdSense is a common way to earn money. It connects you with advertisers who bid for keywords matching your content, maximizing your ad revenue.
Recommend products or services to your readers and earn commissions when they make purchases through your referral links. Choose products you trust, and use affiliate marketing plugins like PrettyLinks or ThirstyAffiliates.
- Online Store
You can use your blog to make direct sales of digital and physical products. Use plugins like Easy Digital Downloads for digital goods and WooCommerce for physical items. You can also create an Amazon affiliate store to earn commissions by promoting products from Amazon.
Step 10: SEO and blog visibility
Once your blog is up and running, it’s essential to think about its visibility in search engines. SEO outreach and link building are crucial strategies to enhance your blog’s reach.
By building high-quality backlinks and collaborating with other bloggers or websites, you can boost your blog’s authority and search engine ranking.
Moreover, maintaining a strong SEO brand reputation ensures that your blog is trustworthy and authoritative source in your niche.
Consider investing time in learning about these strategies or hiring professionals to assist you. This will not only drive organic traffic to your blog but also establish your brand’s reputation in the digital space.
Step 11: The importance of uptime and performance
Uptime is paramount for WordPress websites. Consistent availability makes sure visitors can access content anytime, enhancing user experience and maintaining credibility.
Every downtime moment can translate to lost opportunities, be it sales, leads, or brand impressions. For businesses, unexpected downtimes equate to lost revenues and potential erosion of customer trust.
Furthermore, search engines focus on site reliability when ranking; frequent downtimes can impact SEO performance, pushing your site lower in search results.
Ensuring optimal website uptime requires diligent monitoring, quality hosting services, and regular site maintenance. A reliable WordPress installation isn’t a luxury; it’s a necessity in today’s digital age.
Step 12: Maximizing engagement: The power of subscription forms on a WordPress website
Subscription forms on WordPress websites serve as crucial gateways to audience engagement.
They enable website owners to curate a list of interested visitors, create email newsletter templates, ease direct communication, and foster a loyal community. Beyond gathering email addresses, a well-implemented subscription form ensures consistent and targeted content delivery, enhancing the value visitors derive from a website.
But it’s not just about collecting emails but also ensuring their successful delivery.
Good email deliverability guarantees that the sent emails don’t land in spam folders, maintaining the brand’s reputation and guaranteeing subscribers receive the information they signed up for, amplifying user trust and engagement.
Wrapping it up
Starting a WordPress blog may seem daunting, but it’s a straightforward process, regardless of your technical expertise. Be as creative, complex, or simple as you want.
WordPress makes blogging accessible to everyone, so take the leap and start your first blog post today.
Author bio

Divyesh Bhatasana is a Founder & CEO of Jeenam Infotech LLP who has a passion for helping customers as a Link Building Consultant. You can connect with him on Linkedin.
What Is WooCommerce Product Slider and Why Your Store Needs It
Why Do Product Images Matter So Much in Online Stores? When someone visits an online store the…
0 Comments9 Minutes

How to Streamline Your Customers’ Shopping Experience?
The goal for any online store is to make shopping as smooth as possible. When visitors move…
0 Comments8 Minutes

Strengthening Brand-Customer Relationships Through Gamified Loyalty Programs
Creating lasting connections with customers has become increasingly vital as the marketplace grows…
0 Comments6 Minutes

How to Use SEO and SEA Together in Search Engine Marketing
In digital marketing, search engine marketing (SEM) plays a critical role in improving online…
0 Comments10 Minutes
Content Marketing Growth Hacks: Real Shortcuts to Drive Traffic
Are you still lagging in content marketing? Sticking to these old strategies seems…
0 Comments10 Minutes

How to Build a Strong Local Following Using Social Media Marketing
In the days of likes, shares, and stories, local businesses have a golden opportunity to create…
0 Comments9 Minutes

Why WooCommerce is the Best Choice for Your Online Store?
WooCommerce stands out as a top option for anyone looking to build an online store. This platform…
0 Comments8 Minutes
How to Use AI-Powered SEO Tools for WordPress eCommerce
SEO is a critical factor in the success of any e-commerce WordPress store. As competition…
0 Comments11 Minutes