
Best Free 1080P 60FPS Screen Recorder for All Platforms
When it comes to displays, not only are resolutions important but how many frames per second are getting delivered is equally important. More frames mean you get to see more instead of a lot of skips in your frame. Similarly, if the recorder supports high frame rates, it will deliver a better video quality at the end when it comes to screen recording. Videos and games are places where you need them the most.
Quick Links
This post shows how you can record screens in 1080P 60FPS quality on various platforms, including Windows, Mac, and Android using recording applications.
Best 1080P 60FPS Screen Recorder for Windows & Mac
While speaking of HD 60FPS screen recording software, you cannot miss EaseUS RecExperts. It lets you adjust the frame rate flexibly from up to 60, and then export the recorded video in 1080P quality. Plus, if you want to capture 4K videos, you can also rely on this program.
Main stunning features of EaseUS RecExperts:
- Flexible screen recording: It enables you to capture full screen, partial screen, or even multiple screens with one simple click.
- Versatile screen recorder: It supports recording screen, webcam, and audio (system sound or microphone), simultaneously, or separately.
- Capture live streams: You can use it as a streaming audio recorder to capture and save almost all live music; or record streaming videos from Hulu, Steam, or other platforms.
- Capture video conference: If you don’t know how to record Zoom meeting without permission, you also can rely on this software. It allows you to make it with or without host’s permission secretly.
How to Record a 1080P 60 FPS Video on Windows with EaseUS RecExperts
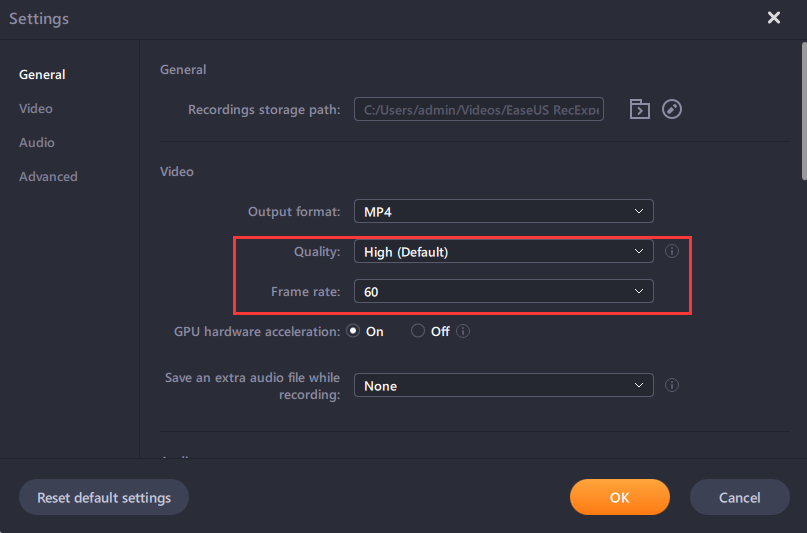
Step 1: Open EaseUS RecExperts, and then click on the settings icon. Switch to General, and then set the frame rate to be 60 FPS and the quality to High. Then hit “OK”.
Step 2: Next, choose the area that you want to record. You can either choose full screen or only a particular area.
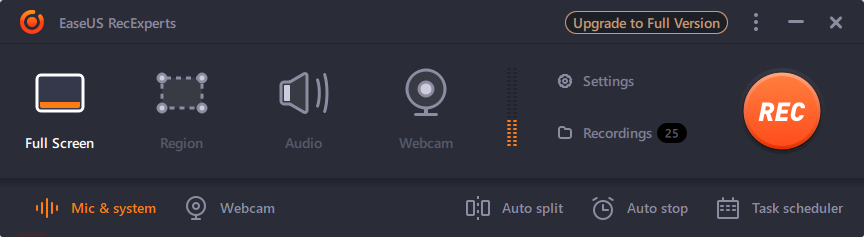
Step 3: Finally, click on the REC button to initiate the video recording. You will get a three-second countdown. Once done, click “Stop”, and then save the file after minor correction.
The Best 1080p 60fps Screen Recorder for Mac
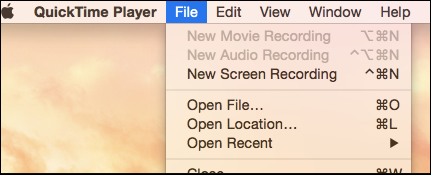
macOS offers a built-in open source screen recorder that you can use to capture any video or use it to record anything on the screen with high quality. In the earlier version, it was using QuickTime, but now with a press of a couple of keys, you can choose to record the screen. The only problem is that if you need to record internal audio, you need to use the software Sunflower, a virtual speaker, and then use it to record the audio. That said, the built-in free screen recorder Mac is brilliant and records at 1080P and 60FPS without a problem.
Pros
- Easy to use, and no configuration required.
- Records full screen, application, or selected region
- Can be directly saved into online cloud storage
Cons
- To record system sound, you need to use external software.
- No way to configure frame rate and resolution
How to record 1080P 60FPS Screen Recording in macOS
Step 1: Make sure everything is ready, and when you press the key combination of Command+ Shift + 5. It will open the screenshot and recorder tool. Select the video recorder icon followed by region or window selection.
Step 2: The next step is to start recording by clicking on the record button and doing whatever you have planned to do in the video.
Step 3: once done, you can then stop the recording and finally save it on your desktop or a predefined location.
The Best HD 60fps Screen Recorder on Android
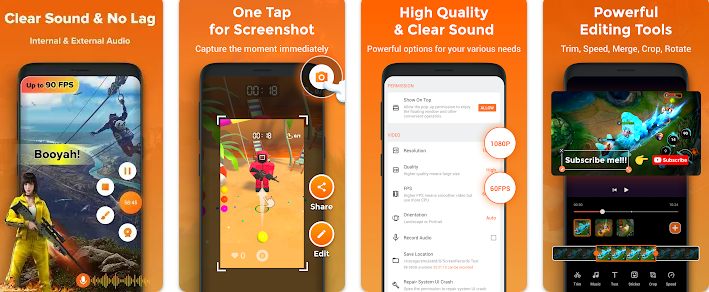
XRecorder is a powerful screen recording tool for Android Smartphones, which allows you to record anything and everything. You can take screenshots, and make doodles. It also means you can record any streaming videos, or live games, all with complete audio and HD quality. Since it is free and leaves no watermark, it is an excellent choice for your smartphone. It also adds a menu in the notification panel so you can instantly start and stop recording.
Pros:
- Record and export video at 1080P
- No watermark added even though it’s free.
- Allows you to record webcam with video recording
- Gameplay recording at variable FPS supported
- Countdown timer to prepare you before recording
- Allows pause and resume recording
Cons:
- No option to merge videos and add background noise
- No option to draw anything to screenshots and videos
- Ads are displayed in the free version.
How to capture 1080P 60fps video on Android with XRecorder
Step 1: Install and launch the XRecorder. It will ask for permission to display over apps. Please set it to allow. Next, click on the settings icon, and then choose resolution to be 1080P, quality to 16MPS, and FPS to 60.
Step 2: Next, set up control settings such as recording mode, countdown, shake the phone to stop recording, choose to enable camera, and more.
Step 3: Lastly, click on the Record button to start recording. Once you are done with recording, save it on the phone, and then edit it with any video editor tool.
In this part, you need to find a good application on the Android application market that supports recording screen at 1080p or 60 fps. And also, introduce this tool with its description, pros and cons, and a tutorial.
Conclusion
Recording video at 1080P 60FPS is easy. Most devices and smartphones now come with high resolution and support for a high frame rate for gaming and streaming. All you need is the right tool. We hope you can get help from this post.

What Is WooCommerce Product Slider and Why Your Store Needs It
Why Do Product Images Matter So Much in Online Stores? When someone visits an online store the…
0 Comments9 Minutes

How to Streamline Your Customers’ Shopping Experience?
The goal for any online store is to make shopping as smooth as possible. When visitors move…
0 Comments8 Minutes

Strengthening Brand-Customer Relationships Through Gamified Loyalty Programs
Creating lasting connections with customers has become increasingly vital as the marketplace grows…
0 Comments6 Minutes

How to Use SEO and SEA Together in Search Engine Marketing
In digital marketing, search engine marketing (SEM) plays a critical role in improving online…
0 Comments10 Minutes

Content Marketing Growth Hacks: Real Shortcuts to Drive Traffic
Are you still lagging in content marketing? Sticking to these old strategies seems…
0 Comments10 Minutes

How to Build a Strong Local Following Using Social Media Marketing
In the days of likes, shares, and stories, local businesses have a golden opportunity to create…
0 Comments9 Minutes

Why WooCommerce is the Best Choice for Your Online Store?
WooCommerce stands out as a top option for anyone looking to build an online store. This platform…
0 Comments8 Minutes
How to Use AI-Powered SEO Tools for WordPress eCommerce
SEO is a critical factor in the success of any e-commerce WordPress store. As competition…
0 Comments11 Minutes